Create this unique text stroke effect on scroll:

See it in action
While working at Wix Studio I created this section to show the “power of CSS”:
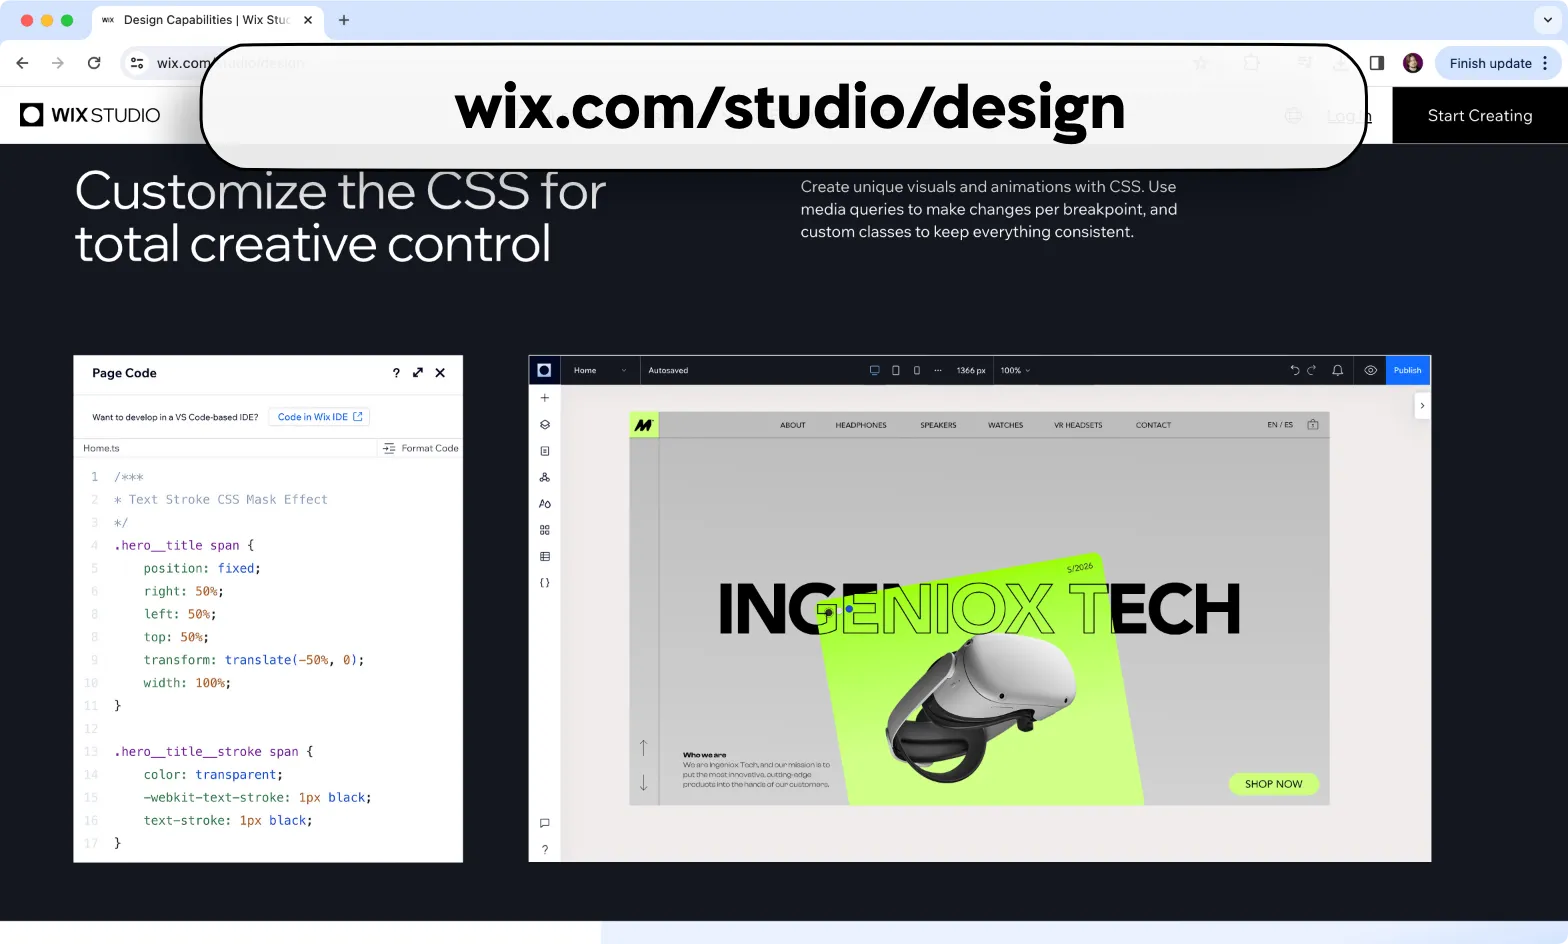
The "trick"
The trick is using an image “sandwiched” between 2 headings.
- One “regular” heading at the bottom
- A small image above it
- And a “fake” heading with text stroke and transparent color.
So when scrolling the “fake” heading hides the “real” heading, and that’s how this effect works.

Step by step instructions for Webflow
I am using Relume's Client First library for the structure, but it's optional.
List of layers
The section has to be very tall and centered to achieve the effect.
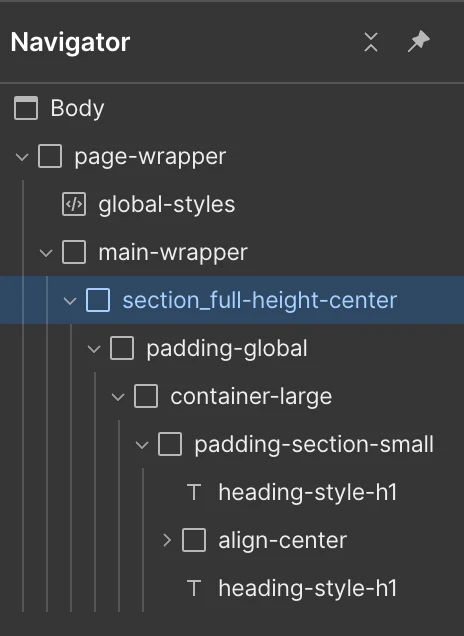
Main Section
- Section name: section_full-height-center
- Display: Flex
- Align: Center / Center
- Spacing: Margin left and right on Auto
- Size: Min. height of 220 VH

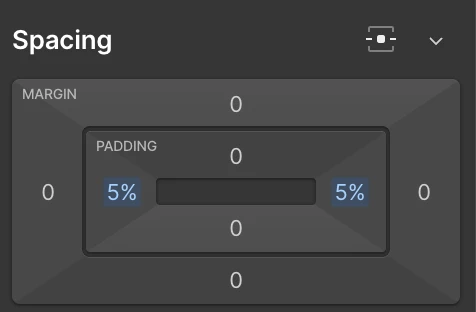
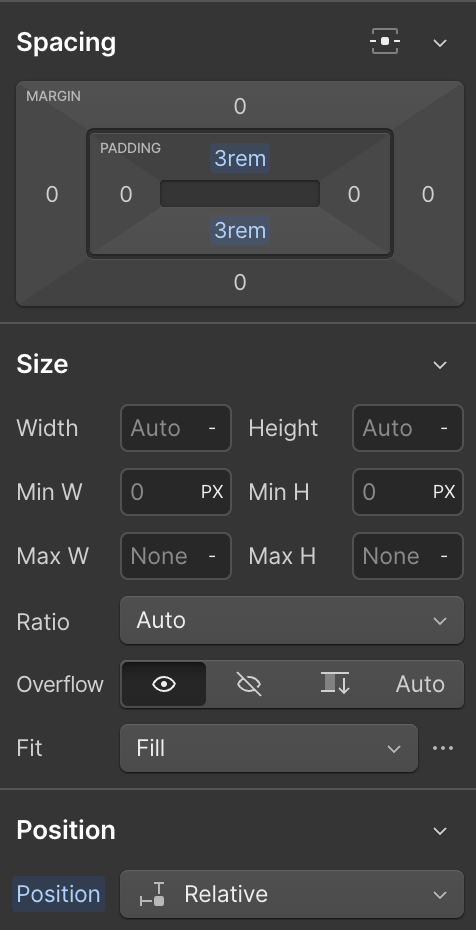
Padding sections
- Layer name: padding-global
- Padding: Left/Right 5%
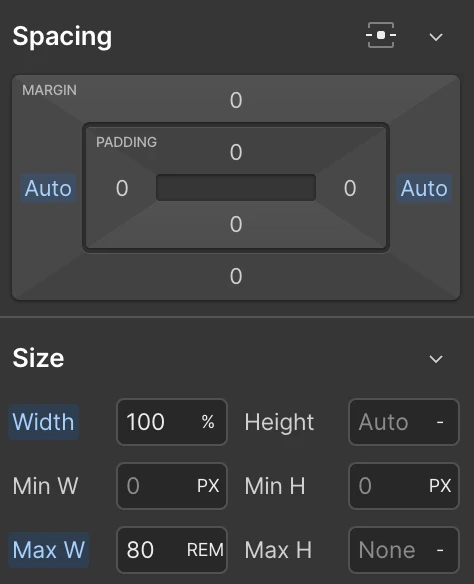
- Layer name: container-large
- Margin: left/right Auto
- Width: 100%
- Max width: 80 REM (optional)
- Layer name: padding-section-small
- Padding: Top/Bottom 3 REM
- Position: Relative (this one is important)
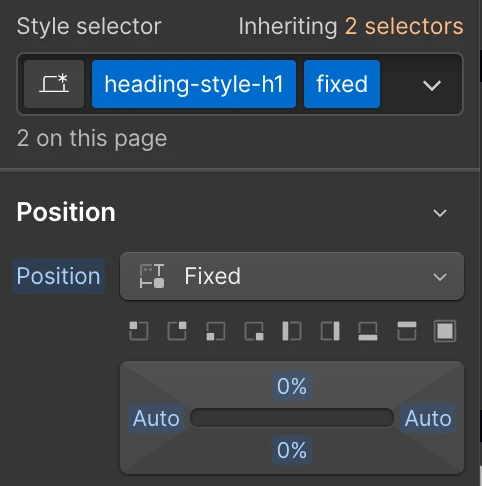
The "real" heading
The "real" heading has to be fixed to the screen. The "fake" one will scroll past it.
Positon: Fixed to center
The image
The image will centered to the screen.
- Dislay: Flex
- Align: Center / Center
- Margin left/right Auto

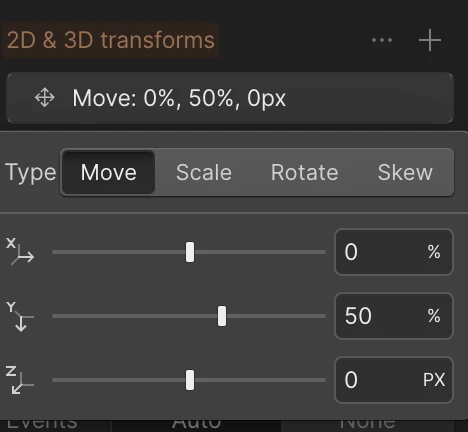
The "fake" heading
This is one will have most of settings. It has to have a higher z-index, text stroke and transparent color.
- Position: Fixed to center
- Z-Index: 2 (anything higher than the heading)
- Text Stroke: 2px and black (or any color that matches the "real" hading)
- Transform: Y axis at 50%
- Custom properties: color with the value of transparent
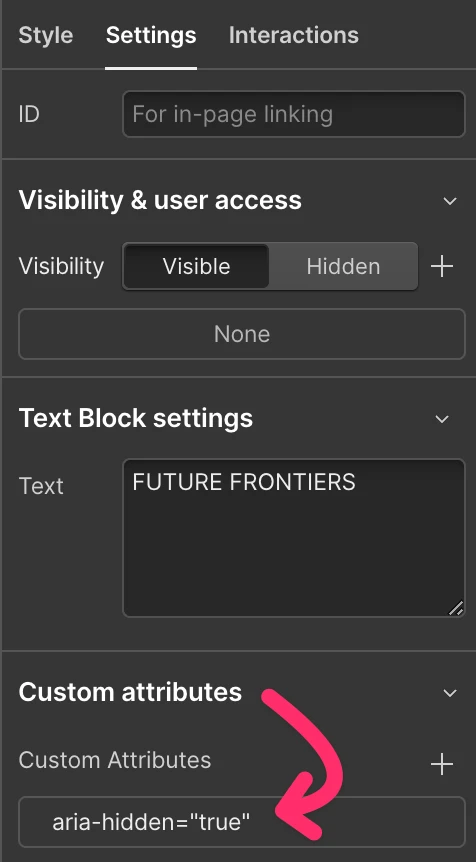
- Under Settings set a custom attribute of aria-hidden of true


Final thoughts
Sometimes unique effects require some work, but that what makes them special.
This can be applied to both Webflow, Elementor or any other pager builder.


